HyperLPR3车牌识别-五分钟搞定: 中文车牌识别光速部署与使用
简介
HyperLPR在2023年初已经更新到了v3的版本,该版本与先前的版本一样都是用于识别中文车牌的开源图像算法项目,最新的版本的源码可从github中提取:https://github.com/szad670401/HyperLPR
支持多种类型车牌

快速安装
使用Python平台可以直接使用pip进行安装,方便快捷:
1
python -m pip install hyperlpr3
快速测试
安装成功后,可以使用命令行工具对本地图像或在线url进行快速测试,这边我们使用一张新能源的车辆照片进行测试:

1
lpr3 sample -src https://image.xcar.com.cn/attachments/a/day_170125/2017012516_5cb21721d2f35a0f2984HCOTsEuQ6jwg.jpg
测试结果如下:
1
2
3
----------------------------------------
2023-02-28 11:27:28.658 | INFO     | hyperlpr3.command.sample:sample:70 - 共检测到车牌: 1
2023-02-28 11:27:28.659 | SUCCESS  | hyperlpr3.command.sample:sample:73 - [绿牌新能源]沪AD07979 0.9999245405197144 [582, 1306, 992, 1431]
启动在线API服务
如果您有部署到云端去调用的需求,HyperLPR3中已经内置了启动WebApi服务的功能,支持一键启动,且自带SwaggerUI文档页面,相对方便友好:
1
2
# 启动服务 workers为进程数量,请根据需求进行调节
lpr3 rest --port 8715 --host 0.0.0.0 --workers 1
启动后可打开SwaggerUI的路径:http://localhost:8715/api/v1/docs 查看和测试在线识别API服务:
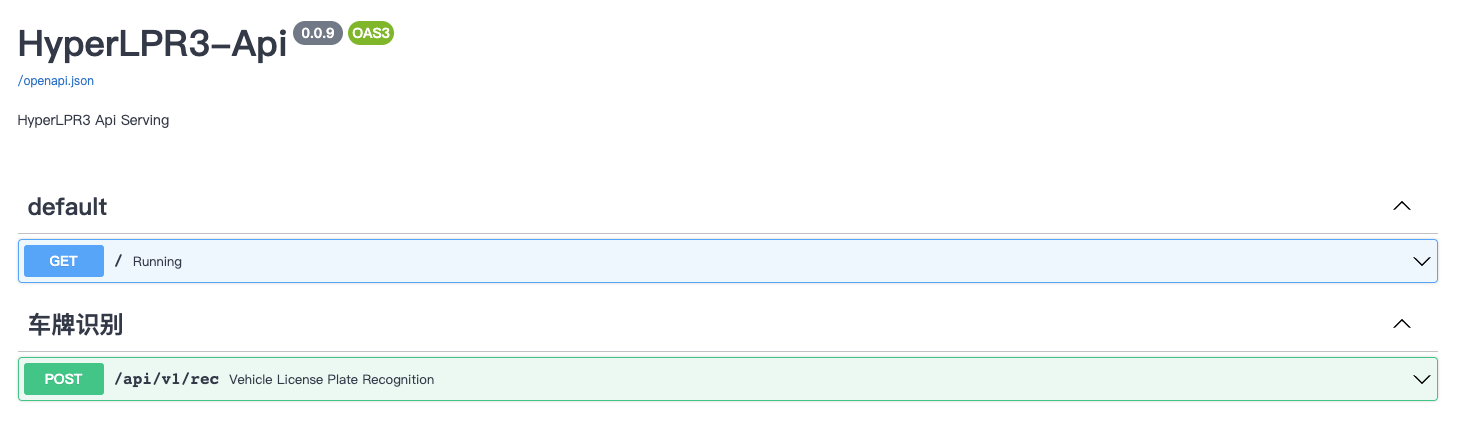
启动后即可对车牌识别Api进行使用
在Python代码中快速上手
如果您需要在自己的Python工程中引入HyperLPR3进行车牌识别功能的开发,那您可以使用如下代码进行调用:
1
2
3
4
5
6
7
8
9
10
11
# 导入opencv库
import cv2
# 导入依赖包
import hyperlpr3 as lpr3

# 实例化识别对象
catcher = lpr3.LicensePlateCatcher()
# 读取图片
image = cv2.imread("images/test_img.jpg")
# 识别结果
print(catcher(image))
仅需要3行代码即可完成对HyperLPR3库的调用
返回的数据解析非常简单,参考以下代码内容即可,中文字体可在在此下载:
https://github.com/szad670401/HyperLPR/blob/master/resource/font/platech.ttf?raw=true
1
2
3
4
5
6
7
8
9
10
11
12
13
14
15
16
17
18
19
20
21
22
23
24
25
26
27
28
29
30
31
32
33
34
35
36
37
38
39
40
# 导入cv相关库
import cv2
import numpy as np
from PIL import ImageFont
from PIL import Image
from PIL import ImageDraw
# 导入依赖包
import hyperlpr3 as lpr3


def draw_plate_on_image(img, box, text, font):
    x1, y1, x2, y2 = box
    cv2.rectangle(img, (x1, y1), (x2, y2), (139, 139, 102), 2, cv2.LINE_AA)
    cv2.rectangle(img, (x1, y1 - 20), (x2, y1), (139, 139, 102), -1)
    data = Image.fromarray(img)
    draw = ImageDraw.Draw(data)
    draw.text((x1 + 1, y1 - 18), text, (255, 255, 255), font=font)
    res = np.asarray(data)

    return res


# 中文字体加载
font_ch = ImageFont.truetype("platech.ttf", 20, 0)

# 实例化识别对象
catcher = lpr3.LicensePlateCatcher(detect_level=lpr3.DETECT_LEVEL_HIGH)
# 读取图片
image = cv2.imread("image.jpg")

# 执行识别算法
results = catcher(image)
for code, confidence, type_idx, box in results:
    # 解析数据并绘制
    text = f"{code} - {confidence:.2f}"
    image = draw_plate_on_image(image, box, text, font=font_ch)

# 显示检测结果
cv2.imshow("w", image)
cv2.waitKey(0)
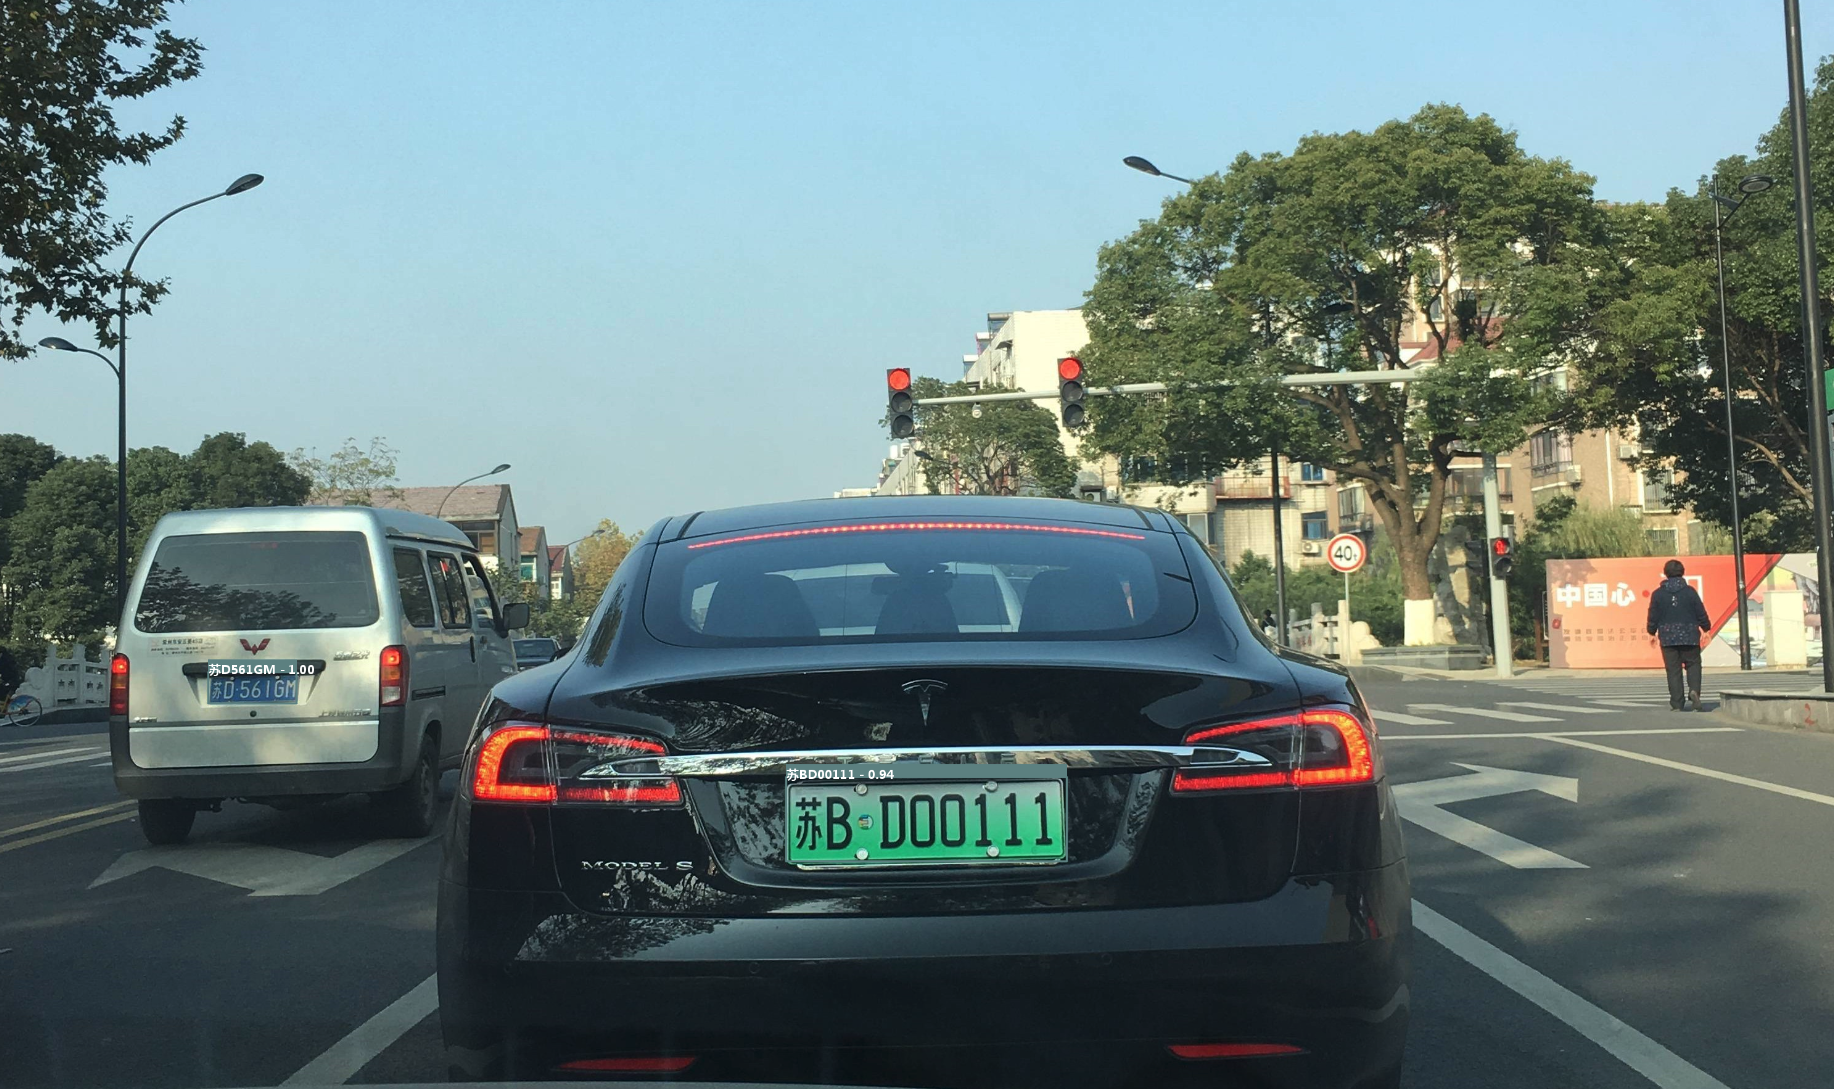
绘制结果如下:
帮助
以上为HyperLPR3的Python端五分钟快速上手,需要获取其他的帮助,请移步到项目地址:https://github.com/szad670401/HyperLPR
This post is licensed under CC BY 4.0 by the author.